Please note the following information may include affiliate and referral links. This means if you click through a make a purchase I will receive a small commission at not additional cost to you. This is a simple way you can support me and what I do here at Things to do in Salem. You can read more about my use of affiliate links here. Also please note this post has been included as an entry into a giveaway/sweepstakes.
So you want to start a blog?
That’s amazing. Launching Things to do in Salem has been one of the most fun and fulfilling things I have ever done. Sure, it comes with its challenges, the ups and downs like anything else in life does. However the opportunities it has provided me, the experiences it has given me, the people I have met and connections I have made make the challenges worth it a million times over. It allows me to be creative, help others and build content around something I am passionate about.
I have seen a few questions over the years asking me my opinions on starting a blog, questions looking for some general guidance and the like. The following information is just that – a beginner’s guide to starting a blog. Here we go!
First, consider what you want to write about.
I’d begin with a general brainstorming session. What are you good at? What are you interested in? Is there a certain topic you could talk about for hours on end? Write those things down and consider them for the topic of your website and blog. Picking something you are passionate about is so important because it will keep you motivated and interested in creating content. This will also help you grow your audience because they will see you are offering information and opinions on something you actually care about. I seriously can’t emphasize this enough.
Second, pick your domain name.
Okay, picking a name can be challenging. There are a few things you should consider when selecting your domain name. I chose thingstodoinsalem.com because it’s what someone who is looking for (you guessed it!) things to do in Salem, MA would type into a search engine. I wanted it to be user friendly and easily indexed (understood) by the computers that crawl websites for search engines so they can know what it’s about.
You should choose a name that stands out to you, is easy to type or spell and easy to remember. It could be as simple as your name! I know some bloggers who just use their first and middle or first and last name as their domain name and brand.
I suggest sitting down with a piece of paper and pen and doing some more brainstorming. Write down words you like, combinations of phrases, the general theme your website is going to be about and any other info that is important. Start combining words and elements of things you have written to see what sticks.
Do you have the name picked out? Great!! Now it’s time to get it all registered and set up.
Registration 101
There are the two pieces to setting up a website – registering the name (the .com part of the website) and registering “space” or hosting (where that website will live).
Head over to Hostgator.com and create an account. Once you have that set up it’ll walk you through registering a domain name and selecting a hosting package. It’s super easy and far less intimidating than people think it is, I promise.
Get a free domain name for the first year
As an affiliate of Hostgator they sent me information recently regarding free domain names. Anyone who signs up for a new 12+ month hosting plan for a shared, OWP, or cloud hosting will get a free .com, .org, or .net domain for their first year!
Here are a few bullet points for you on this deal that you will need to know.
- .COM, .NET, and .ORG TLDS only.
- New shared, cloud, and OWP hosting packages (not valid for existing accounts)
- Valid for packages 12 months or longer
- Must be claimed during purchase
- Only one domain per purchase
Why not use a free platform?
I know there are many free platforms you can use to create your website, such as Wix.com or Blogger.com. There are tons of reasons why you should avoid free servers, in my humble opinion. A few of those reasons are the following:
- It looks unprofessional using a URL like yourwebsitename.wix.com/myweb or yourwebsitename.blogspot.com
- Your website will have ads placed on it by the company you set it up with.
- Using a free platform limits your ability to monetize your website later on down the road if you want to.
- You don’t actually own your content when you use a free server. Technically your host does, so in this example Wix.com or Blogger.com would own the content that you spent your time and energy putting together.
- Often times you hit pay walls and upgrades with the free platforms which will often mean you are sinking money into it anyways. Often times these upgrades cost more than just setting yourself up on your own to begin with!
A quick note
I don’t want this to confuse anyone new to this so I am noting it here quickly – wordpress.com and wordpress.org are not the same thing. WordPress.com is a free website building tool and server. WordPress.org is software you download and host on your own server.
Still with me?
If not, I offer domain registration, hosting package set up and basic WordPress.org installs so you can skip this stuff and go right to customizing and writing content. If you’d like to get more information about that, head on over to missalysenicolemedia.com. You can read about all of the ways I can help you build a website and grow an audience.
Setting up WordPress.org with HostGator
Alright, you have your domain name registered and a hosting package purchased. You’re ready to go with getting WordPress.org software installed so you can get to creating! One of the things I truly love about HostGator is that it only take a few clicks to get through the WordPress software installation process. It makes it so easy, you guys.
First, log into your control panel. This information would have been emailed to you by Hostgator as you registered everything in the previous steps. Make sure you keep that information in a safe place!
Once you’re in, you need to look for this button on the main screen:
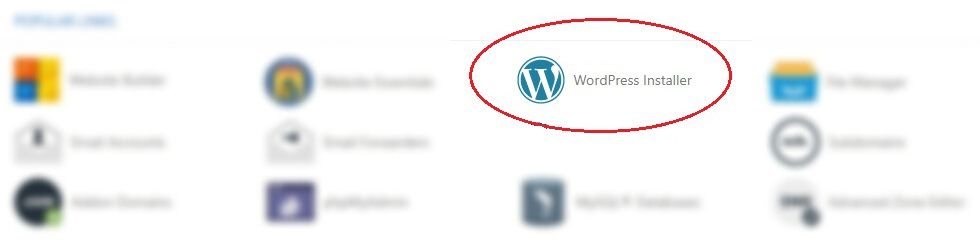
It will walk you through a few steps to install WordPress.org software for you. Super easy! The first screen you hit will look like this:

Use the drop down to find your domain name in the list. Leave the following field where it says “directory” as it is, then hit next. The following screen will look like this:
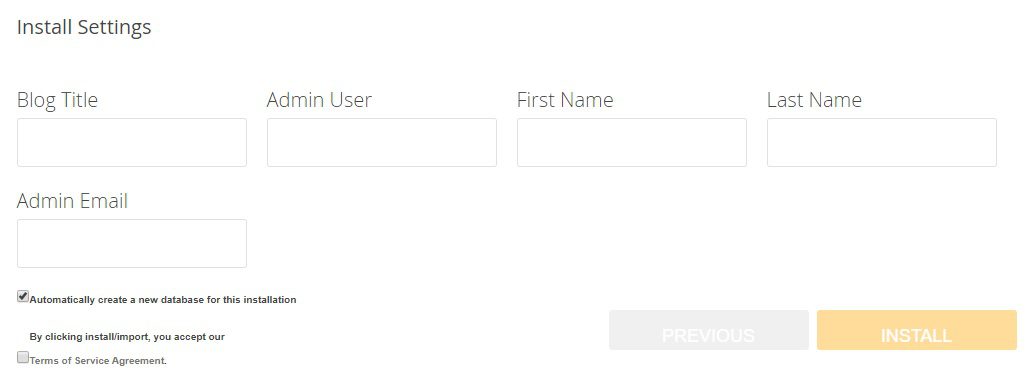
Fill in the fields appropriately, check the boxes confirming the terms of service and hit install. You will be then be looking at this screen:

Pay attention to the area that I circled in red, that is going to be the username and password to log into your website. This information is different from your log in information for your control panel at HostGator. Write it down somewhere safe.
Whew. Okay, now it’s time to log into your website. If this doesn’t work right away, give it a little time then check back. It is usually very quick however it could take up to a day or two to populate in extreme cases.
Log into your website
Hit the orange “login” button you saw above, enter your username and password and congrats, you’re now on your dashboard. Upon first log in, it’s going to look something like this:
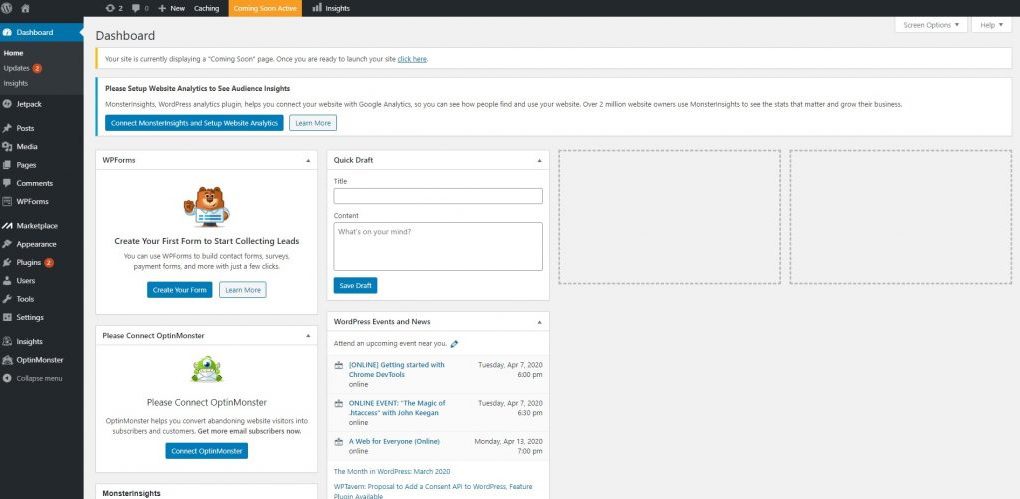
Great!! We made it through the steps of getting you set up. You now have a Hostgator account, a domain name, hosting and WordPress software installed. Here is where you get to set everything up how you like it and begin writing. Use the black tool bar on the left side of your screen to start playing around.
Some quick reference information to get you rolling…
- “Posts” is where you create all of your blog posts
- Hover over the word “appearance” in the navigation then click “themes” to install a theme. Click “customize” to play around with how it looks once the theme is installed. More on that in a few…
- “Page” is how you create a sub page such as contact me, about, etc.
- “Comments” is where you can read and moderate comments left on your blog posts.
- “Plugins” is where you can download code/programming that will control parts of your website or create things for you such as contact forms or automate certain processes.
Okay, on to themes and appearance
I am going to steal the definition wpbeginner.com wrote to define what a theme is because it’s stated perfectly.
“In WordPress, a theme is a collection of templates and stylesheets used to define the appearance and display of a WordPress powered website. They can be changed, managed, and added from the WordPress admin area under Appearance » Themes. WordPress.org has a large collection of free ones in their Themes Directory.”
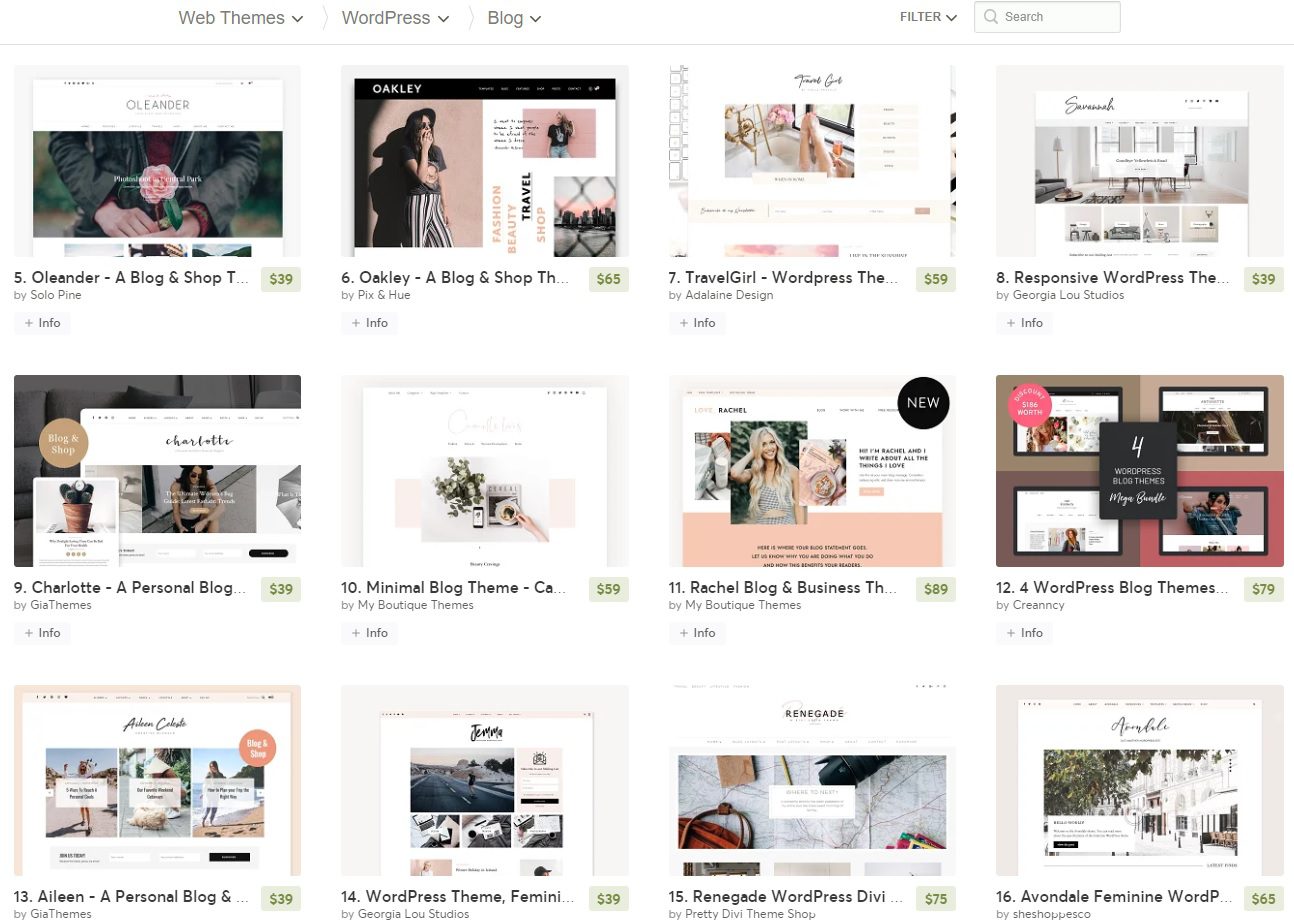
You can use a free template provided to you by WordPress or you can go out and purchase one of your own to install. If you want to explore some options, CreativeMarket.com is my personal favorite. There are tons of options ranging from bright and cute to magazine style, to photography based and more.
Some notes for you…
- If you’re planning on selling items on your website, look for themes that are Woocommerce ready. This is a plugin that will allow your website to be eCommerce ready very easily.
- Be sure to read ALL DOCUMENTATION AND NOTES from the designer before purchasing. Make sure it’s compatible with WordPress.org, follow all instructions given to you and read everything through. Due to the digital nature of these downloads they are often nonrefundable so read all information given to you.
Other things to do + General tips and info
If your aim is to grow an audience and get yourself set up for future success you’re going to want to do a few other things once your website is running.
- Set yourself up with a newsletter
I neglected this in the beginning of my content creation journey and I see now how much value it holds. I use Mailerlite and I suggest you do the same…back in the day I used another popular newsletter company and Mailerlite is far more user friendly and very intuitive. It is also free up to 1,000 subscribers. - Register social media handles
You know the drill – head over to Instagram, Facebook, etc. and get your usernames secured. - Make and keep a running list of content you want to write
This could be stored in a physical notebook that you keep with you, in an app in your phone, in Google docs, etc. Just make sure you have it in an easily accessible place because you never know when an idea might hit. - Come up with a content schedule
Decide how often you want to publish content and stick with it. Consistency is key. - Keep the future in mind
Are you planning to grow your blog and website into a full time business? Do you want to collaborate and work with others? Are you not interested in any of that and just want a place to write about your experiences and passions? Keep all of this in mind as you make decisions and lay the foundations for the direction you’re heading.
Alright – we did it. I hope this was helpful!! If you have any questions feel free to reach out to me. Good luck on your new blogging journey!!
xoxo, Alyse <3
Pin for later