13
Jan
Did you guys know I’m a former professional photographer? Yup. I shot weddings full time for about five or so years, taught classes, spoke to college students, etc. I have a strong background in the visual arts and today on the blog wanted to share some tips for you on your visit to Salem. Salem is such a gorgeous city, you’re absolutely going to want to take photos as you wander.
Can you just take pictures with your cell phone? Definitely. Cell phone cameras these days have come a long way and do quite a good job. However, if you want to up your game and take solid images, here are some tips and suggestions for you.
Please note some links in this blog post are affiliate links. This means if you click through that link and make a purchase, I’ll receive a commission at no additional cost to you as the purchaser. This is a simple way for you to allow me to continue doing what I do and support my work here at Things to do in Salem! I appreciate your support and feel free to contact me if you have any questions about this. Also please know I would never recommend or suggest something I don’t stand behind. I would never jeopardize the trust of my audience for a sale.
Before we begin, keep in mind these are tips and tricks to help you, however there is truly no one who can tell you how to take pictures. If you like a certain style (even if it goes against traditional “rules”) then do it. The pictures are for you. Have fun and enjoy.
First and foremost, pay attention to light. Find good light, always. This might mean moving closer to your subject, it might mean taking the picture from a different angle, etc.
Avoid photos where the light is coming from behind your subject (unless you’re going for that) because it will either cause lens flare (light orbs in the image) or cause your subject to be shadowed and not in focus/hard to focus on. Taking pictures in good light will also make it easier to get clear images that aren’t blurry.
If you’re comfortable adding a flash gun onto the hot shoe of your camera (the mount on top), go for it. Bounce your flash into the ceiling when you’re shooting in low light to get way better images. (See gear section below for suggestions.) If you aren’t sure what a hot shoe is or if your camera has one, click here to read more about it.
If you’re shooting with a DSLR camera (digital single lens reflex), read the manual that came with it so you understand how your particular camera works. Shoot on “auto” mode until you’re comfortable enough to switch to “manual”. Read about what ISO, aperture and shutter speed are and find those settings on your camera. Some articles on those can be found here: Aperture, ISO, Shutter speed.
Again, there are no right or wrong ways to do things, really. Shoot how you like. However, the following can help you create dynamic and visually appealing images.
The Rule of Thirds
A good thing to keep in mind when composing images is the rule of thirds. The basic principle behind the rule of thirds is to imagine breaking an image down into thirds (both horizontally and vertically) so that you have nine parts, as shown below.

The theory is that if you place points of interest in the intersections or along the lines that your photo becomes more balanced and pleasing to the eye. Now here is an example of this in practice, with an image I took of the Bewitched statue in Salem a year or two ago.
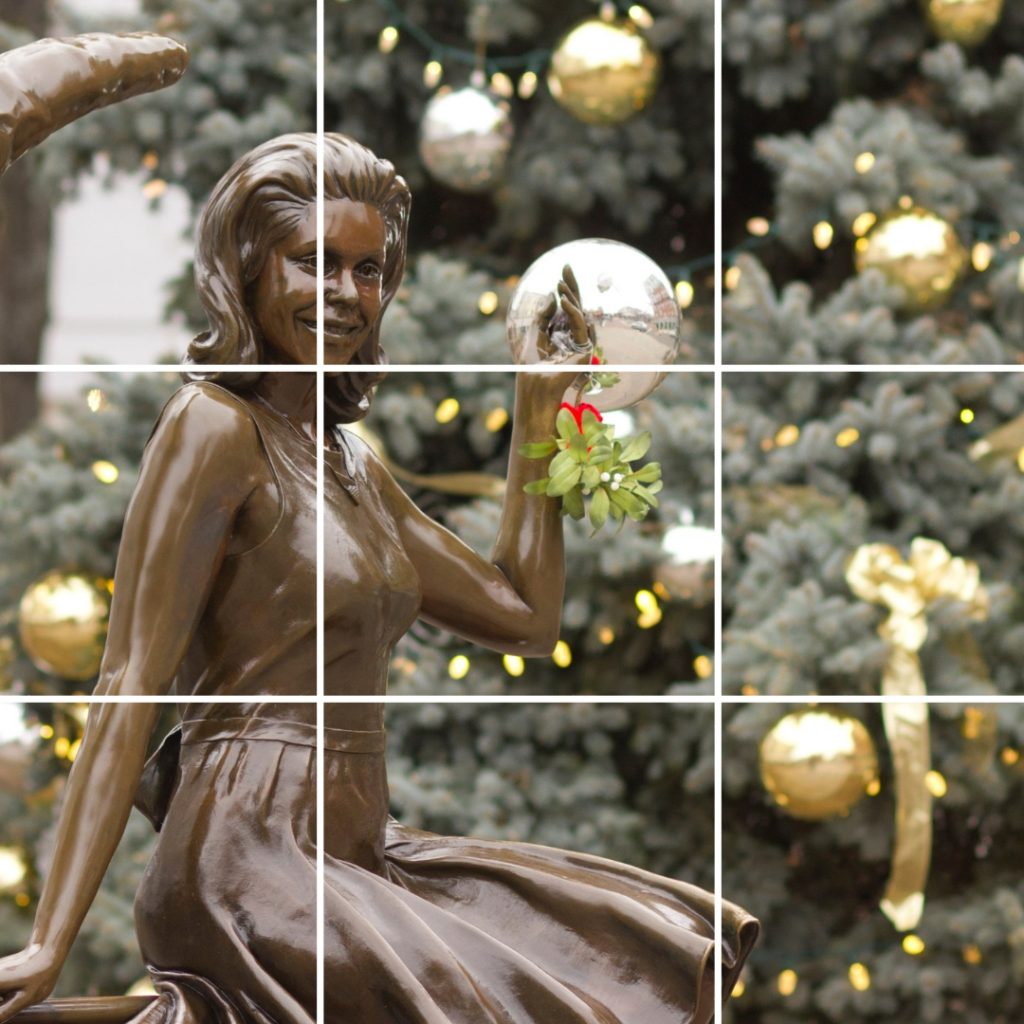
As you can see, the “important” parts of the pictures fall into the grid lines and their intersections.
Shoot from an uncommon perspective
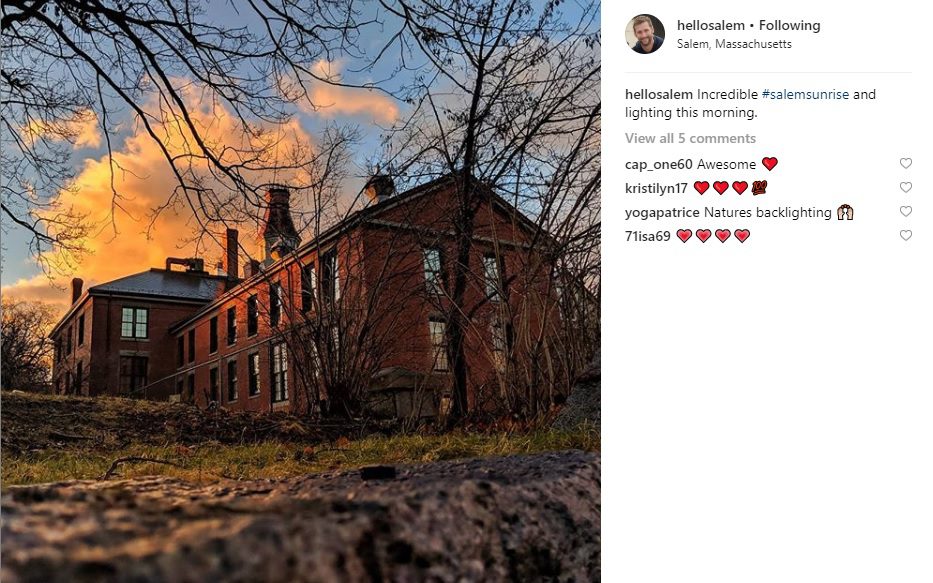
Finding a different angle or perspective is one of my favorite ways to shake up an otherwise “simple” or “common” photo. Someone who is a master of this (in my opinion) is Ty Hapworth. He runs the Instagram account @hellosalem and his work is gorgeous. A good example of this is his photo here, where he takes it from ground level.
Pay attention to the background and framing
Wait for people in your frame to pass if you can, fill your frame and be sure not to cut off arms or legs in your shot.
Make sure there is nothing distracting or brightly colored going on in the background as it will grab the viewer’s eye as opposed to the subject.
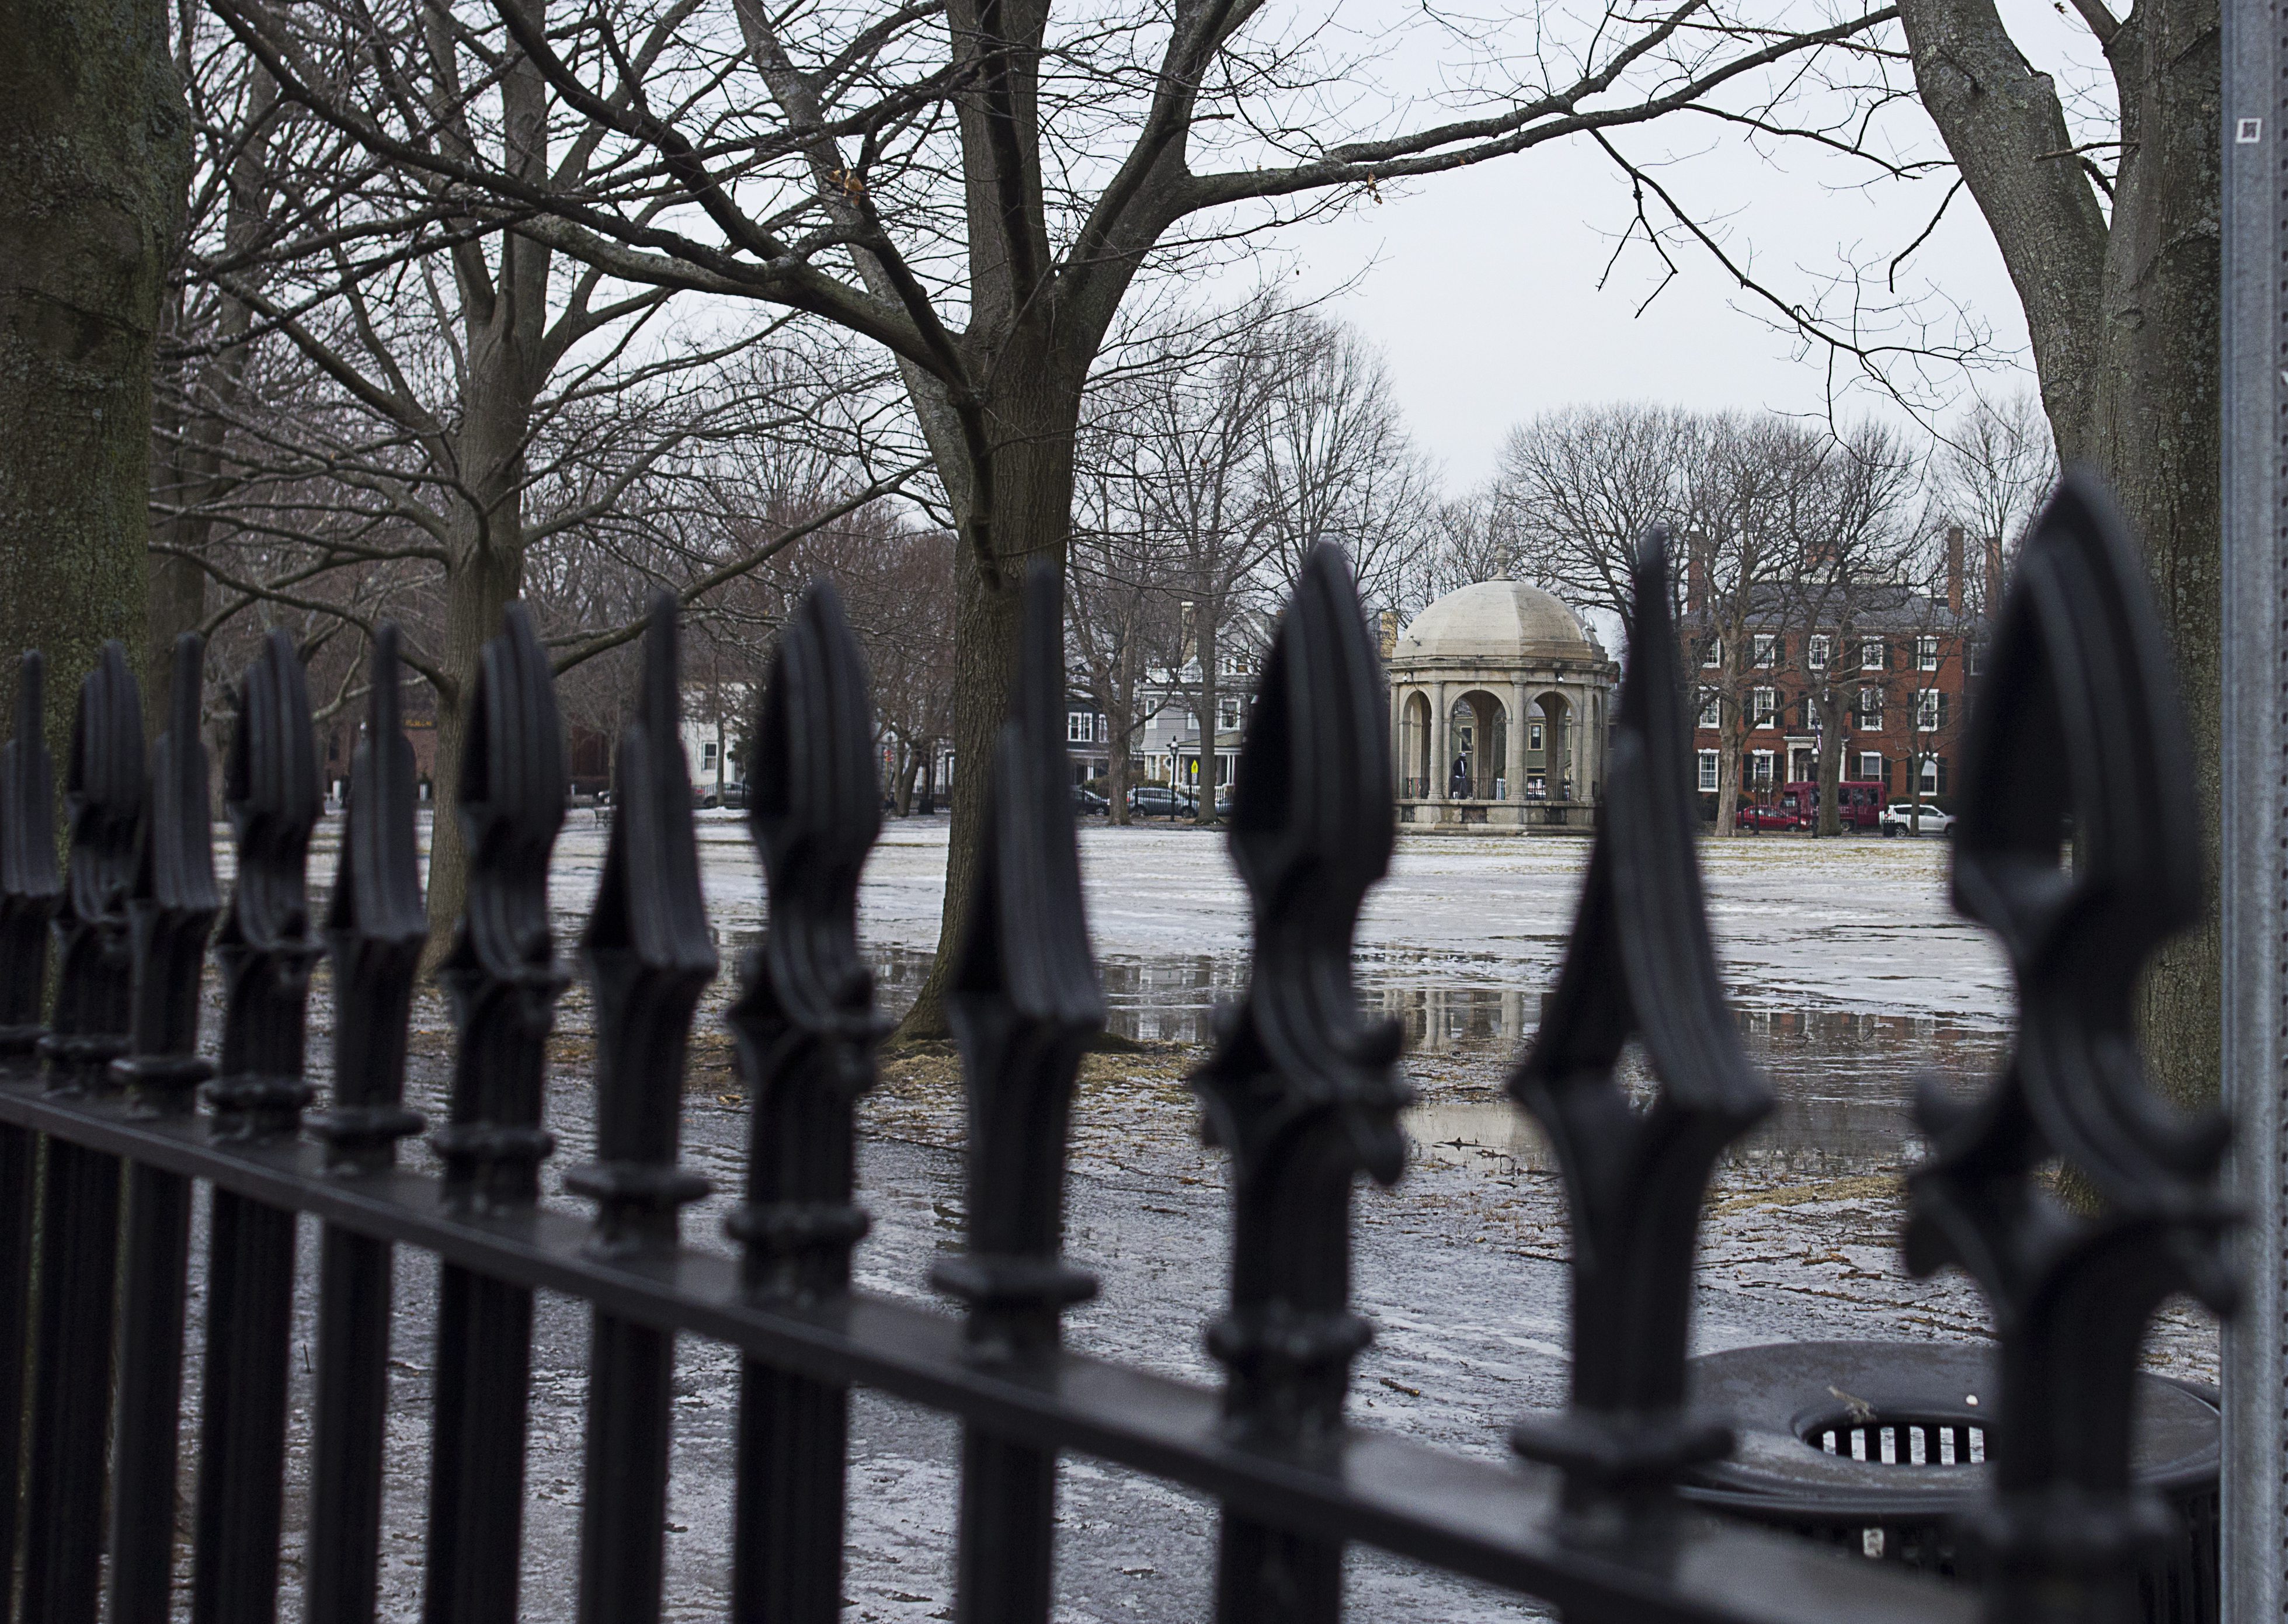
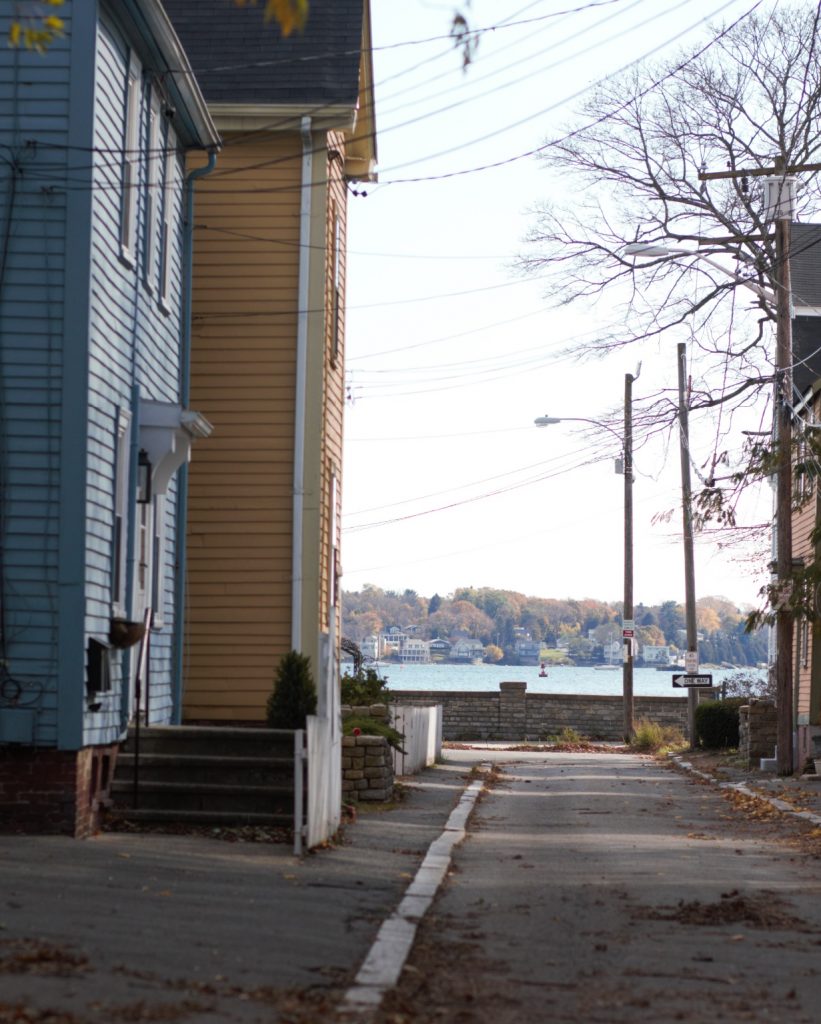
Clean lines, linear aspects and symmetry create a nice sense of motion and balance in a picture so pay attention to road lines, street posts, power lines, the sides of buildings, etc. They can all make for a very visually pleasing image. A few examples of this from my own photography are as follows:
In this image, the viewer’s eye is drawn down the length of the sidewalk and goes to the water in the background.
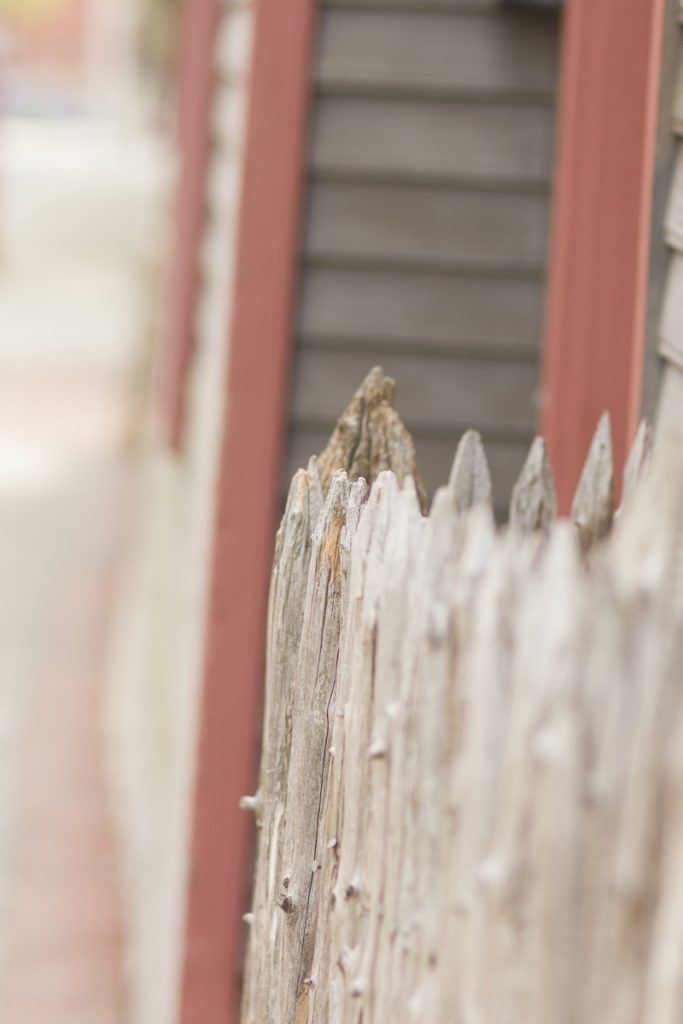
In this one, the viewer’s eyes go down the length of the fence because of the linear motion the wood creates. This is emphasized by the super shallow depth of field. (What is depth of field? Click here to read about it.)
Are you planning to edit your images later with a program like Photoshop? Check on your settings to determine if you’re shooting JPEG, Raw, etc. File format is important depending on what you want to do with the pictures afterwards. Also take a peek at how large the images taken are.
There are many more tips I could offer, of course, but for the sake of this blog post not being massive, I’ll stop here. The above info should help you create nice pictures to remember your visit to Salem for you to enjoy once you’re home.
Don’t try to figure your camera/lens/flash situation out while you’re here. Practice ahead of time, learn the settings and how it works with enough time to get it down. This way you aren’t stuck flying by the seat of your pants.
Some businesses or attractions may not allow photography or flash photography. Be mindful and respect the rules of where you are. An example of this is the inside of Count Orlok’s Nightmare Gallery. No images are allowed once you’re inside the museum area.
Okay, now for some gear. Keep in mind everyone is going to have different opinions on this over that, Canon versus Nikon, etc. These are just my picks. Here we go!
JOBY Gorillapod
Good for bending the legs to take unique pictures or hand holding. Small and compact. Make sure you read the specs and confirm it can support the weight of your camera!
Shop it on Amazon.com.
Amazon Basics regular tripod, 60‘
A larger tripod for more traditional use versus the compact, bendy one above.
Shop it on Amazon.com.
Gary Fong flash Lightsphere
Good for using on top of a flash gun to soften the light. Compact and small.
Shop it on Amazon.com.
Canon Speedlight 430EX III
A great flash gun for use on top of your camera to light your images properly. Keep in mind I shoot Canon, so their range of gear is what I am familiar and comfortable with.
Shop it on Amazon.com.
Eneloop AA batteries
For the flash gun. Eneloop is the only kind I use!
Shop it on Amazon.com.
Canon Rebel T7i
A good camera to up your game. It’s more than a basic point and shoot (you’re going to need to learn the settings, symbols, etc.) but not as intense as a pro level DSLR like the Canon Mark IV which is going to be way more to learn if you’re new to photography.
Shop it on Amazon.com.
Sigma 17-50mm f/2.8 for Canon cameras
A decent zoom lens that doesn’t break the bank. It’s not perfect but the price is good and it’ll certainly do the job. Keep in mind this link will go to the Sigma version that is compatible with Canon cameras. If you’re shooting Nikon or another manufacturer, you need to seek out the appropriate version of this lens for your needs.
Shop it on Amazon.com.
If you aren’t able to afford outright purchasing a camera body or lens, consider renting it for your visit. You can check out websites such as Lensrentals.com or Borrowlenses.com. Just make sure you have it for long enough to use on your trip and return again and OPT IN TO THE INSURANCE you will be offered at check out. It’s so cheap and worth it 10000%. You never know and it would suck to have to pay to replace a broken camera or lens.
GoPro HERO7 Black
If you’re more interested in taking video clips of your visit.
Shop it on Amazon.com.
Lastly, don’t forget extra memory cards! I don’t have direct links to include for this because they vary in size and type depending on your camera and preferences. Figure out what type your camera takes and be sure you have enough space to not have to delete as you go. Keep in mind the larger the file size your camera is saving, the more room you’re going to need in memory cards. So for example, if you’re shooting the images in Raw format for editing later in Photoshop, etc. those file sizes are going to be way bigger than if you were shooting/saving the images in JPEG. There are tons of charts online that will help you get a rough idea of how many images each type and size of card can hold, so be sure to find one for the card you’re considering to get an idea of the space you will have available.
Whew!! I hope this helps all of you who are looking to step up your picture game while in Salem. Be sure to tag me in your pictures so I can see (FB and IG @thingstodoinsalem and Twitter @witchcityguide). If you’re posting on Instagram be sure to use the hashtag #igerssalem for a chance for your image to be featured on the @igerssalem account. I pick the photos on Thursdays, so stay tuned. You never know. Enjoy!! <3